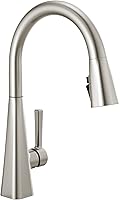
How to Remove a Kitchen Faucet
To remove a kitchen faucet, shut off both supply valves, relieve pressure, disconnect the hoses, then remove the mounting hardware beneath the sink. Lift the faucet out from above after checking that no hoses, wires, or clips remain attached.
On this page (7 sections)
- What should you do before removing a kitchen faucet?
- How do you disconnect the faucet supply lines?
- How do you remove the mounting nuts under the sink?
- How do you lift the faucet out of the sink?
- What if a kitchen faucet mounting nut is stuck?
- What should you check after removing the faucet?
- Should you remove the kitchen faucet yourself or call a plumber?
To remove a kitchen faucet, shut off both supply valves, relieve pressure, disconnect the hoses, and remove the mounting hardware beneath the sink. Lift the faucet out from above once every connection is free.
Inspect the underside before buying tools. A large plastic mounting nut, a metal nut on a threaded shank, and a bracket held by screws can need different approaches.
What should you do before removing a kitchen faucet?
Confirm that you can stop the water and reach the hardware before loosening anything. Empty the cabinet, light the work area, and gather towels, a shallow container, eye protection, and suitable wrenches.
Take a photo of the connections so you can identify hot and cold lines, clips, and hose routing later. Put small removed parts in a tray.
- Find the hot and cold shut-off valves beneath the sink.
- Close both without forcing them. Many turn clockwise, while quarter-turn valves move through a short arc.
- Open the faucet to release pressure and let trapped water drain.
- Confirm that the flow stops, then place towels and a container beneath the connections.
- For a powered faucet, disconnect its adapter or batteries as directed before handling electrical connections.
A brief dribble can be trapped water, but continued flow means the supply isn't isolated. Have faulty valves repaired, or shut off the home's main supply and confirm that flow stops before continuing.
Keep plugs and hands dry. If water is near an outlet or electrical equipment, stop before reaching into that area.
How should you prepare to remove a kitchen faucet with a sprayer?
Trace the sprayer hose before disconnecting it, including any weight, quick connector, or control box. Remove these parts in the order given in the faucet instructions so they don't catch beneath the sink.
Release retaining clips as directed rather than pulling harder on the hose. Label similar connections and avoid bending sensor wires sharply.
How do you disconnect the faucet supply lines?
Disconnect each supply line at the shut-off valve after water flow has stopped. Keep a container beneath the joint, since opening the faucet won't empty every hose.
Use a suitable wrench on the hose nut and support the valve body with a second wrench where its design allows. Keep pressure off the pipe entering the wall or cabinet.
If the valve or pipe moves with the nut, stop. Turning the whole assembly can loosen a hidden connection and cause a leak.
Some faucets have removable hoses at both ends, while others have attached supply hoses. Follow the faucet design rather than trying to unscrew a fixed connection.
PROCURU Braided Supply Lines suit a replacement faucet that needs separate hoses with matching fittings. They are replacement parts, so don't buy them just to remove the old faucet.
The hoses use 316 stainless steel braid and nickel-plated brass nuts. PROCURU states that they comply with NSF/ANSI 61 Annex G for potable water.
Skip these lines if your faucet has incompatible attached hoses or the route needs a different length. Measure the actual path between connections, allowing a gentle curve without stretching, kinking, or rubbing against sharp edges.
During installation, start connections by hand to avoid cross-threading. Follow the hose instructions for tightening and sealants; thread tape isn't a cure for a damaged gasket or mismatched fitting.
How do you remove the mounting nuts under the sink?
Identify the fastening system, then choose a tool that reaches it squarely. A screw-fastened bracket may need a screwdriver or socket rather than either faucet wrench below.
Support the faucet from above as its last fastener loosens. Remove the nut, washer, and retaining bracket, keeping track of any part still surrounding a hose.
When does the DURATECH Basin Wrench make sense?
Choose the DURATECH for a reachable metal nut with space around its sides. Its 11-inch shaft, 180-degree pivoting head, and spring-loaded jaws suit an approach from below or beside the hardware.
The jaws fit nuts from 3/8 to 1-1/4 inches. Check the nut's outside size and nearby hose clearance before choosing it.
Set the head for the loosening direction, then make sure the teeth engage securely before pulling. Use short turns and reposition as needed instead of forcing a slipping grip.
Skip it for oversized hardware, fragile plastic nuts, or a nut crowded by several fixed hoses. Its fixed reach can also be a poor match for hardware set too far inside the cabinet.
When is the RIDGID EZ Change a better fit?
Choose the RIDGID when its shaped inserts match your hardware, especially where supply lines obstruct a closed socket. The open handle slot clears those lines.
Its cubed insert accepts 5/8-inch, 3/4-inch, 7/8-inch, 15/16-inch, and 1-inch nuts. The notched handle accommodates common 2-, 3-, 4-, and 6-tab basin mounting nuts.
That makes it useful for supported hex nuts and tabbed mounting hardware. Skip it if your fastener doesn't match an insert or the tool cannot sit fully over the nut.
Seat the correct end before applying pressure, keeping hoses clear of pinch points. Afterward, wipe the reinforced plastic body and aluminum inserts clean, dry them, and store the inserts inside the handle.
How do you lift the faucet out of the sink?
Lift the faucet straight up only after every hose, wire, and fastener is free. A helper can guide the lines through the opening while you support the faucet above.
Remove a pull-down hose weight or bulky connector first if the instructions require it. Don't drag a connector through a hole it cannot clear.
Lift a loose deck plate separately if the design allows. If the base remains stuck, inspect underneath again before assuming that sealant is the cause.
Gently separate old sealant with a plastic scraper suitable for the sink surface. Avoid sharp metal tools and sideways leverage against the sink rim.
Clean residue with a method approved for the sink material, then dry the area. Inspect for cracks, corrosion, or damage before covering it with a replacement.
What if a kitchen faucet mounting nut is stuck?
Improve the tool fit and access before adding force. Viewed directly toward the nut's face, a standard right-hand threaded nut loosens counterclockwise; working upside down can make that direction confusing.
Brush away loose debris, reposition the light, and check that the wrench engages the nut rather than a washer or bracket. Stop if the tool slips repeatedly or the sink flexes.
For corroded metal hardware, use penetrating oil only if it's compatible with nearby materials, following its label. Catch drips and keep it away from electrical parts and drinking-water openings.
Don't use heat or an improvised cutting tool beneath the sink. If the nut crumbles, won't grip, or needs access you cannot safely create, leave it for a plumber.
What should you check after removing the faucet?
Check the sink openings, valves, hoses, and cabinet before installing the replacement. Dry wet areas so you can distinguish spilled water from an active leak.
Look for frayed braid, kinked hoses, corrosion at fittings, and damp valve stems. Address damaged plumbing before it becomes hidden behind new hardware.
Count and measure the sink holes. Read 1-hole vs 3-hole kitchen faucet differences before assuming that a deck plate will cover every unused opening.
Check the replacement's mounting method and connections, too. Our guide to how to choose a kitchen faucet covers reach and fit, while are all kitchen faucets the same size? explains the measurements to compare.
If you're still choosing a replacement style, our kitchen faucet guide explains pull-down, touchless, and commercial-style options. Keep the water shut off until the replacement is connected according to its instructions.
Should you remove the kitchen faucet yourself or call a plumber?
Remove it yourself when the water shuts off fully, the connections stay steady, and the hardware is reachable. Call a plumber for moving pipes, failed valves, badly corroded fasteners, or unfamiliar electrical and filtration connections.
For tool choice, pick the DURATECH when adjustable jaws can surround a metal nut. Pick the RIDGID when its inserts match the mounting hardware, and buy PROCURU hoses only if the replacement needs those fittings and that length.
The final decision in how to remove a kitchen faucet is whether the next turn loosens a fastener safely or strains the plumbing. Once removal and repairs are complete, follow our guide to replacing a kitchen faucet for installation and leak checks.
When you're ready to install, use our kitchen faucet replacement guide to plan the hose routing and mounting sequence before restoring water.
Frequently asked questions
Do I have to turn off water to remove a kitchen faucet?
Yes, close both hot and cold shut-off valves, then open the faucet to release pressure and confirm that flow stops. Never disconnect a supply line while water continues running.
If either valve fails to shut off, arrange a valve repair or isolate the home's main supply before continuing.
How do you loosen a stuck kitchen faucet nut?
Start with a wrench that fits securely, clear access, and steady pressure in the loosening direction. Reposition slipping jaws rather than pulling harder.
For corroded metal hardware, a compatible penetrating oil may help, but stop if the pipe, valve, or sink moves, or the nut begins breaking apart.
Can you remove a kitchen faucet without removing the sink?
Usually, you can leave the sink in place and lift the faucet out after disconnecting its hoses and mounting hardware. Inspect the underside first because some fasteners need more clearance than others.
If access requires disturbing drain pipes, wiring, or other fixtures, consider getting a plumber to handle the removal.
Should I replace supply lines when removing a kitchen faucet?
Replace supply lines that are leaking, kinked, frayed, corroded, or incompatible with the replacement faucet. Check whether the new faucet includes attached hoses before buying separate lines.
Reuse undamaged hoses only when their instructions allow it, and match both connection types and the length needed without stretching or sharp bends.